projects
mamagotchi - playroom
Sophia Katrin Reutner
Philip Poplutz
Weixi Song
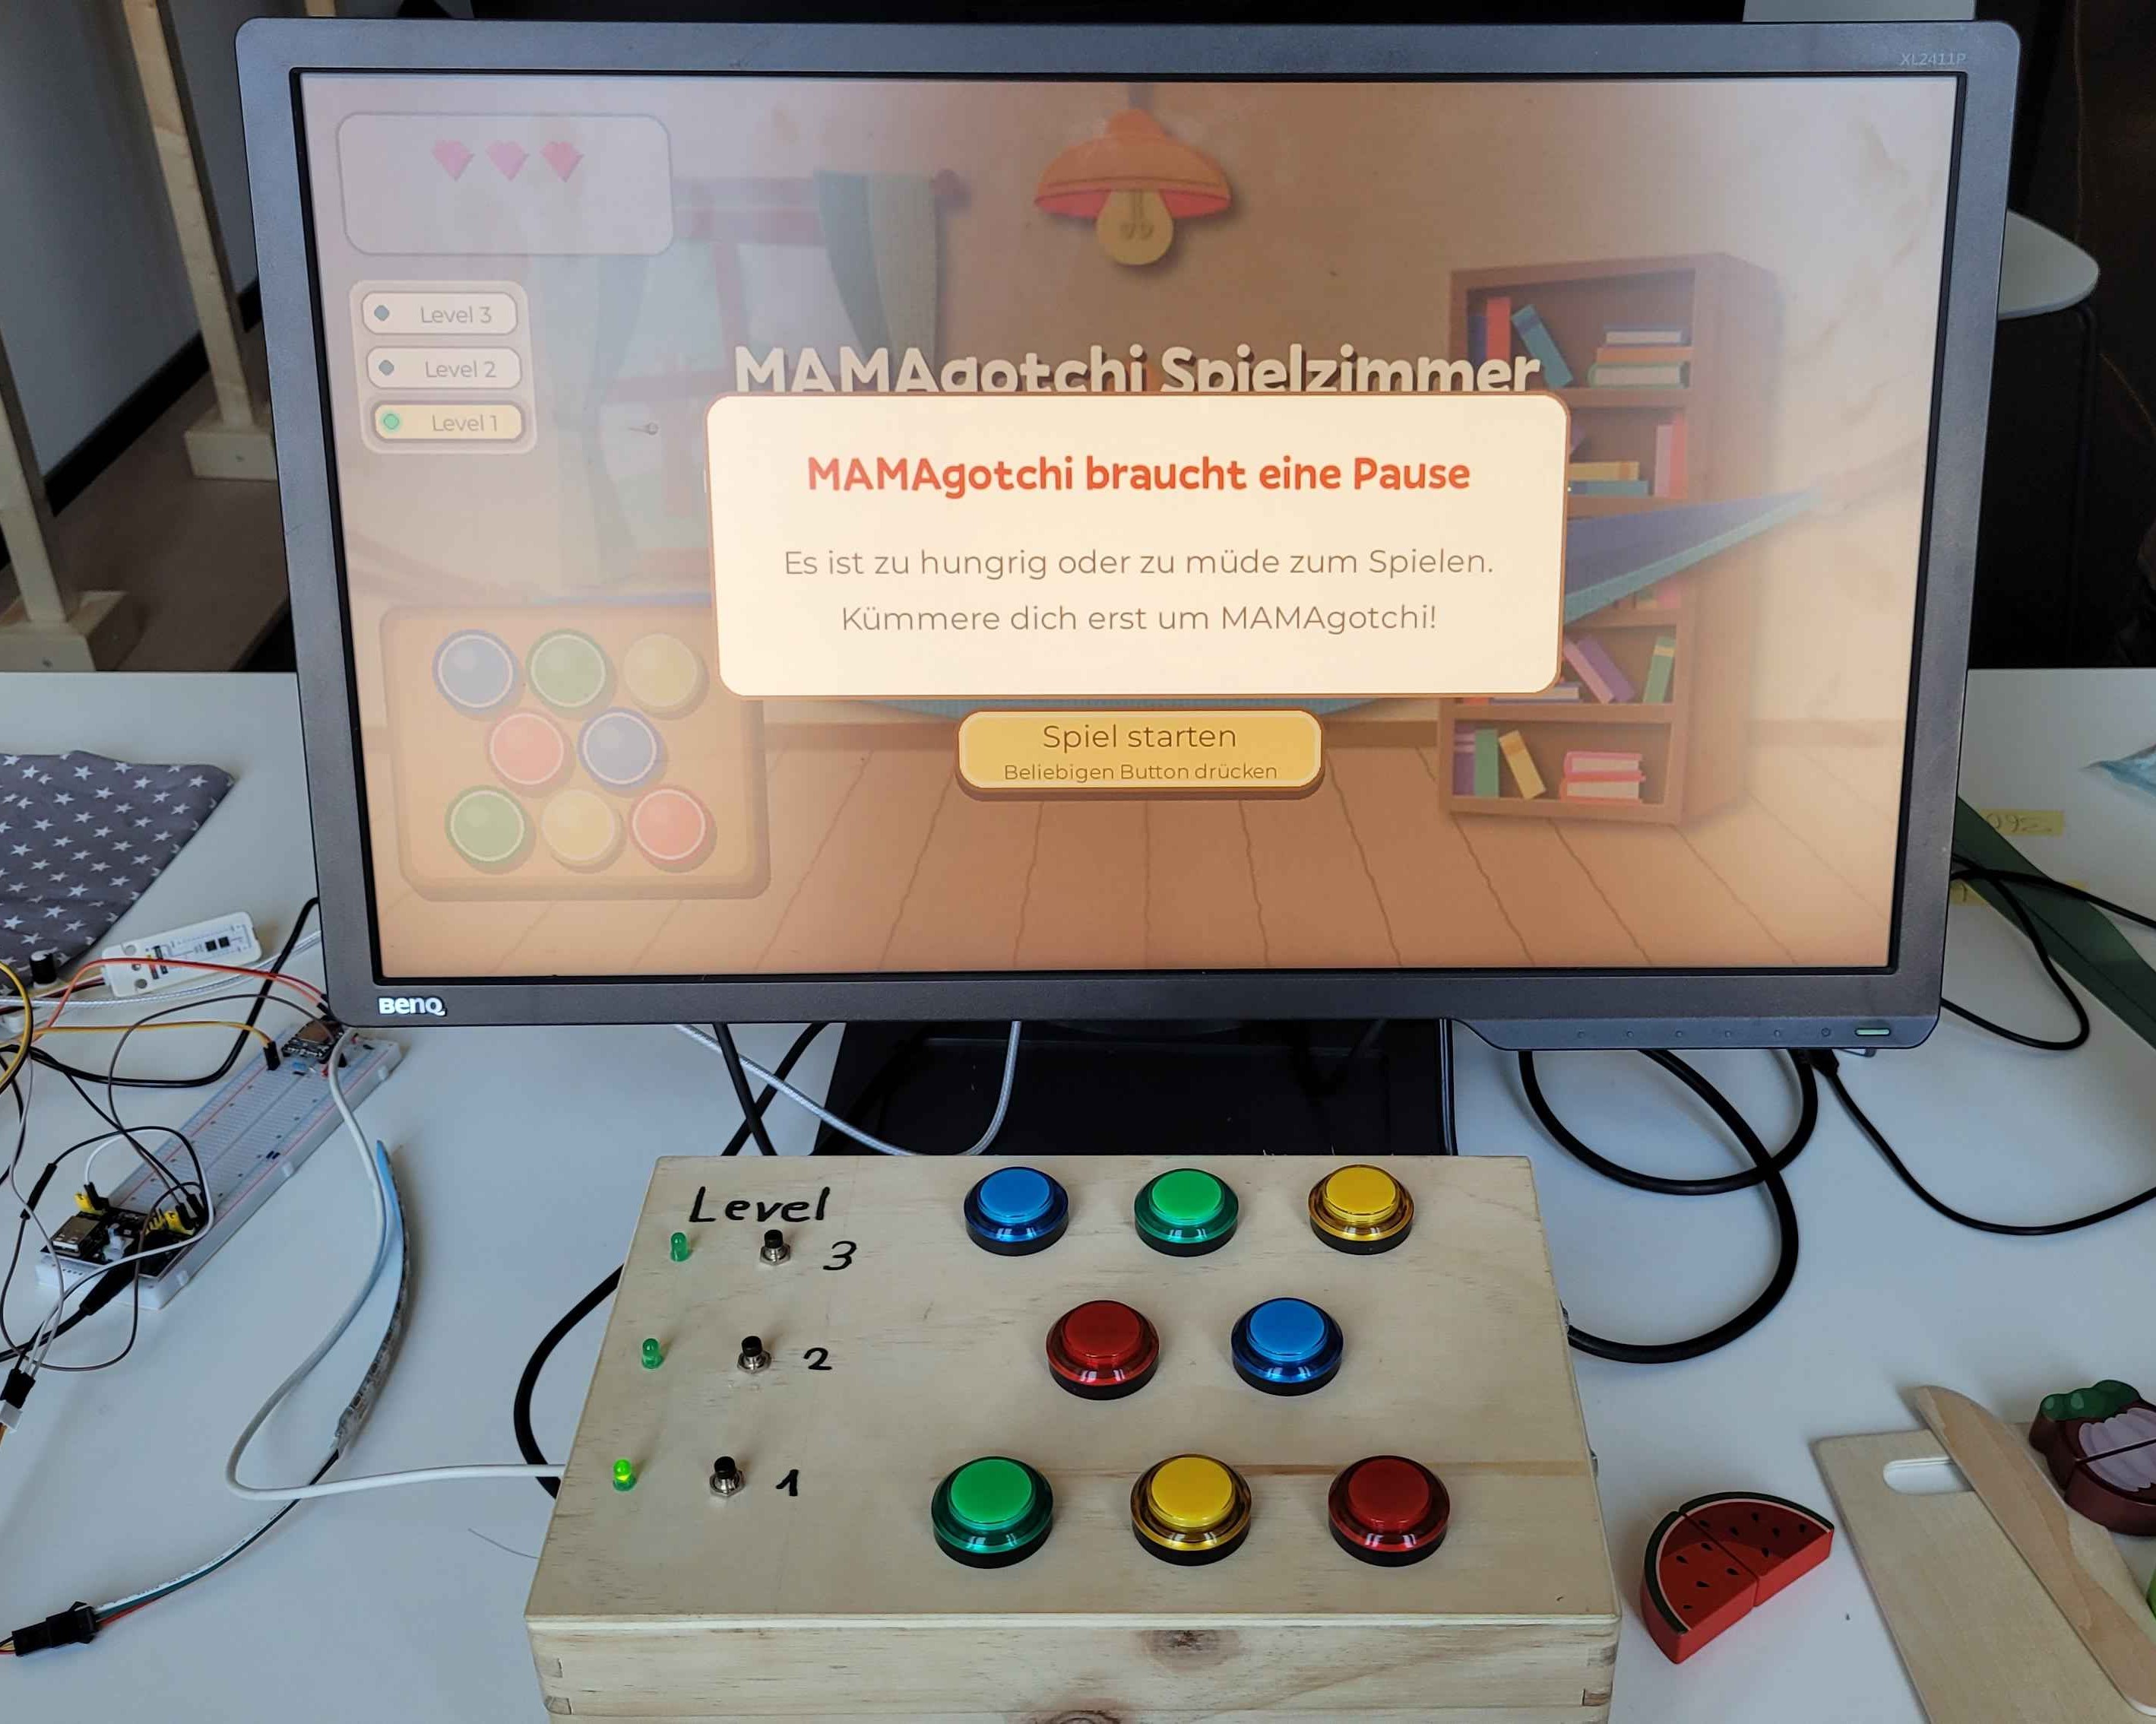

MAMAgotchi – Playroom is a tangible-interaction project built for the playroom within the larger Tangible Interaction course. The playroom station is resposible for entertaining the MAMAgotchi via rhythm games.
MAMAgotchi – Playroom
How can children interact with a digital character through a physical, playful object?
MAMAgotchi – Playroom is a tangible-interaction project built for the playroom within the larger Tangible Interaction course. It pairs a physical wooden controller with eight illuminated arcade buttons and a digital game on a screen. Players don’t use a keyboard, mouse or touchscreen - they watch the screen, press real buttons on the box, and immediately see the digital scene react.
This post documents the whole development process: how the idea took shape, which approaches we tried and discarded, how the hardware and software actually came together, and the engineering problems we had to solve along the way.
From idea to concept
The project started with an open brainstorming phase for possible interactions across the rooms. For the Playroom we developed four early game ideas - among them a reaction game with buttons, imitating given gestures, a weight / pressure-plate puzzle, and a “care” mechanic where a frustration bar rises until you interact with the character.
After discussing them with the other room groups, two ideas were discarded because they were too close to the concept of the dance room. To keep the rooms distinct, we focused on a hand-based interaction at table height. From the remaining directions we committed to a single game - simple enough to grasp in seconds, but expandable through levels and rising difficulty.
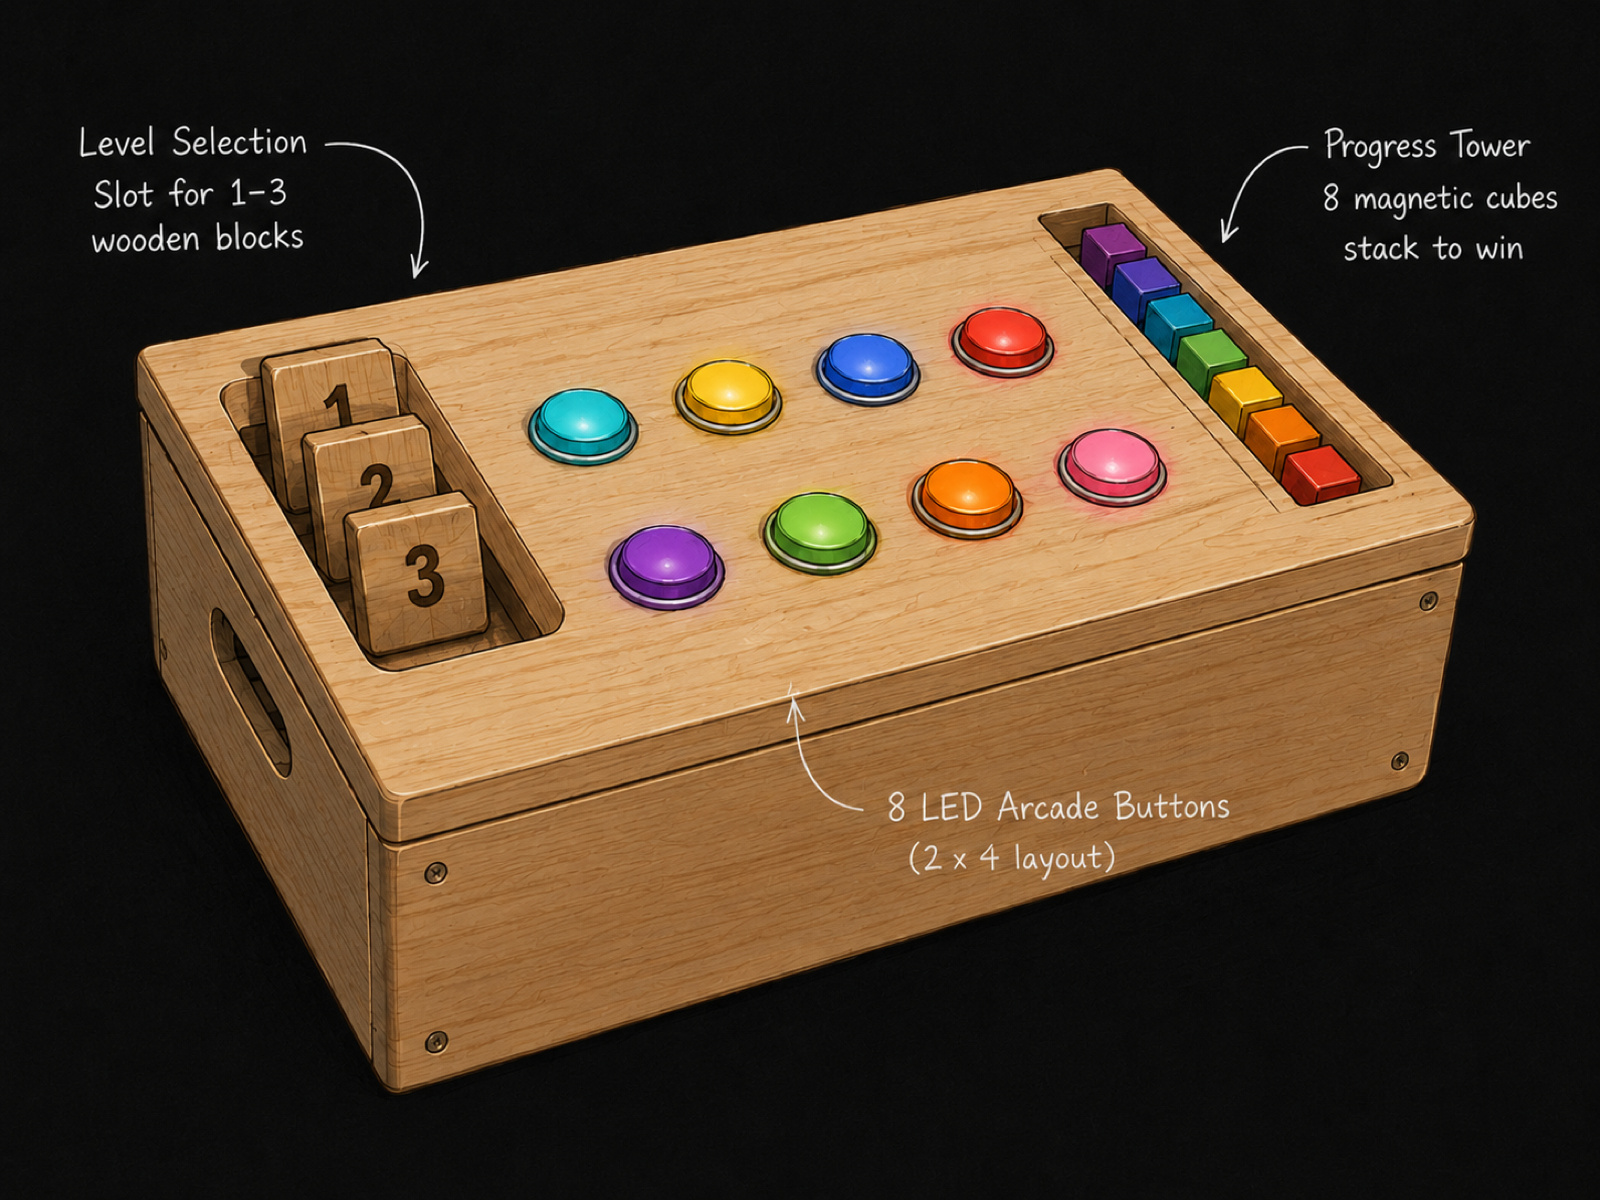
The interaction style was inspired by arcade buttons and by the memory game Simon, where light signals and button presses form the core loop. An early concept rendering already captured the direction. (Figure 1)
Concept and interaction principle
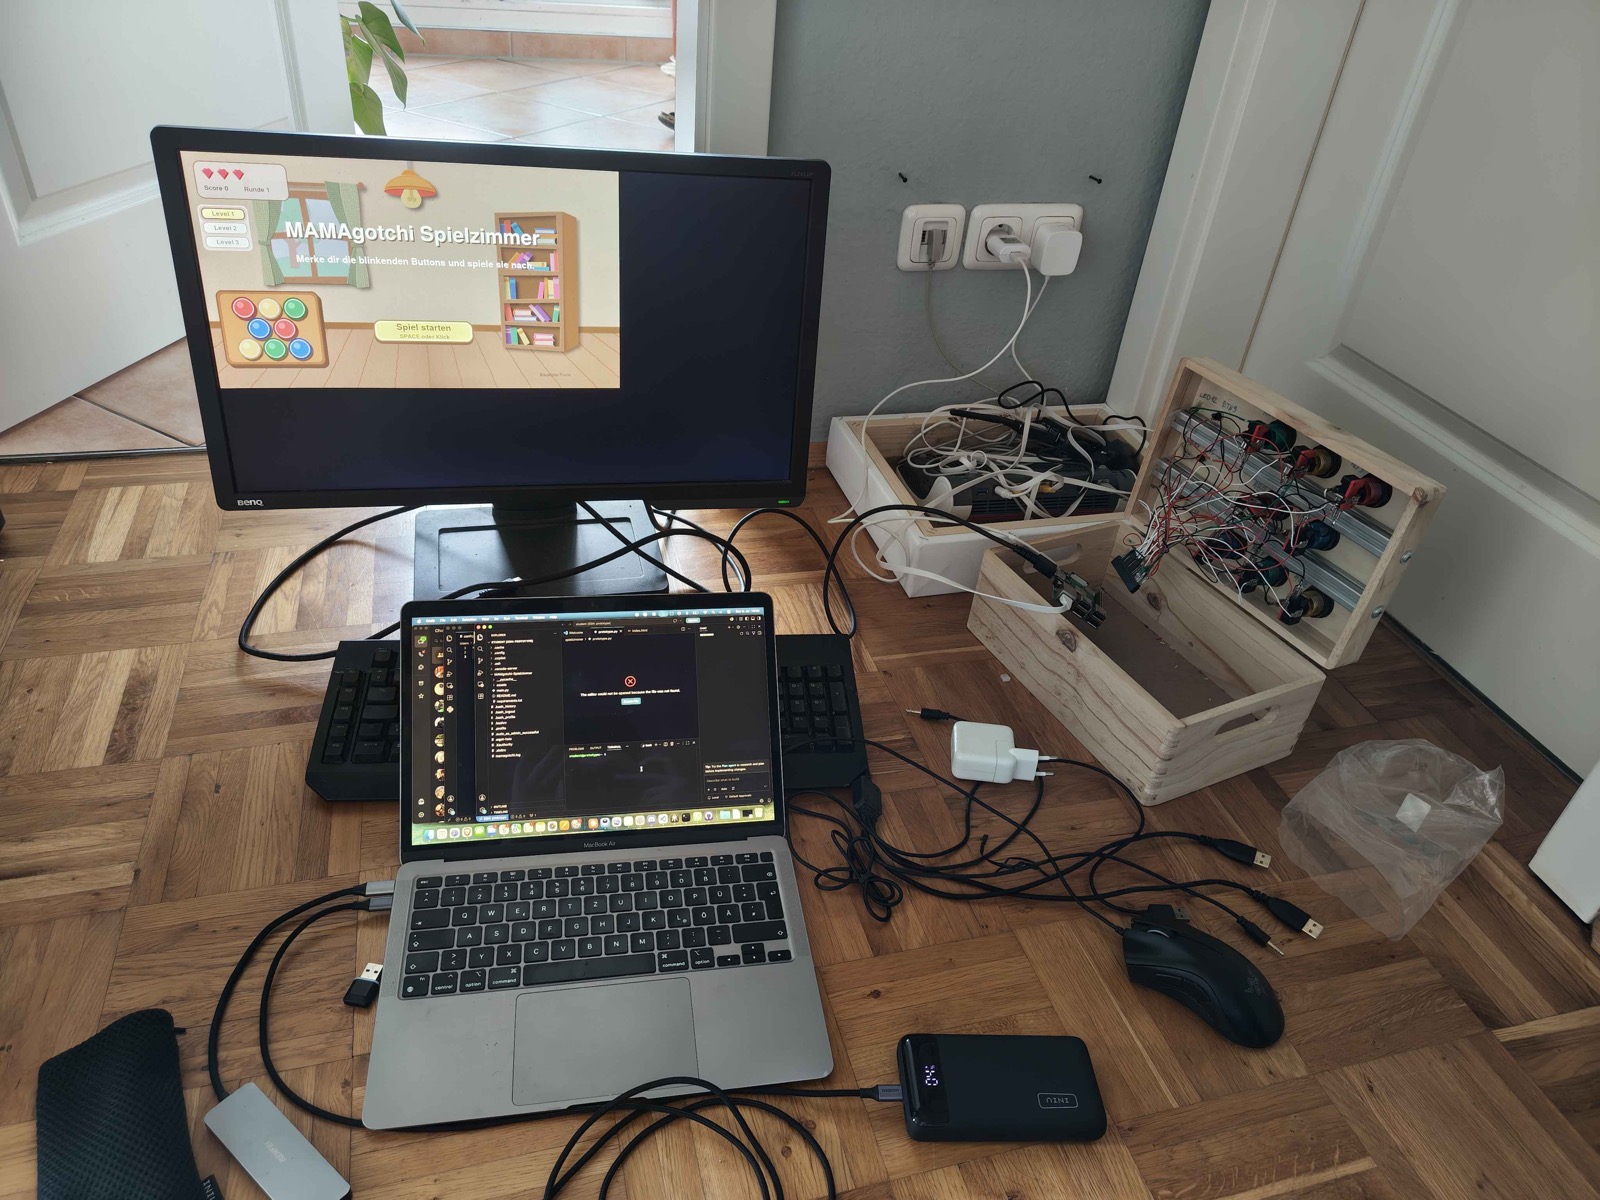
The final concept has two connected parts: a physical wooden box with colourful arcade buttons, and a monitor showing the digital game scene. (Figure 2)
The main figure on screen is a Tamagotchi-like character - the MAMAgotchi. The game follows the Simon principle: a sequence of buttons is shown on screen (each highlighted button also lights up on the box), and the player reproduces it by pressing the matching physical buttons. Correct input advances the round; a wrong press costs a life. Lose all lives and the game ends; complete enough rounds and you win the level.
Because MAMAgotchi is the shared character described above, the Playroom contributes to its play need - and if the pet is too hungry or too tired (needs fed by the other rooms), our room becomes temporarily blocked.
Key decisions - what we tried and what we kept
A large part of the work was choosing between competing approaches. The most important decisions:
| Topic | First idea | Final decision | Why we changed |
|---|---|---|---|
| Screen | Realise the game without a monitor | Monitor driven by a Raspberry Pi | A monitor made a far richer, screen-based game feasible |
| Controller brain | M5Stick C Plus2 + Extend I/O as the “central” unit | Raspberry Pi | Once a screen was allowed, the Pi could drive graphics, sound and GPIO together |
| Level selection | Reed switches + a single magnetic “level pin” you plug into hole 1/2/3 | Three physical level buttons with indicator LEDs | The loose pin could get lost and added mechanical complexity; three buttons are simpler and robust |
| LED driving | A ULN2803 transistor array to switch the 5 V LEDs from 3.3 V GPIO | LEDs driven directly from the GPIO pins | The hardware mentors confirmed 3.3 V is sufficient (slightly dimmer) and it kept the wiring simpler |
| Progress display | A physical progress tower / row of LEDs | Progress shown through the on-screen character animation | Simpler, and it lets the digital scene carry the narrative |
| ESP “win” signal | Cut USB power to the ESP except on a win (via uhubctl) |
A serial JSON protocol over USB | The Pi 3B+ can’t switch USB 5 V in software - the ESP kept running anyway |
These detours weren’t wasted time - each one taught us something about the hardware and pushed the design toward something more robust.
The first prototype
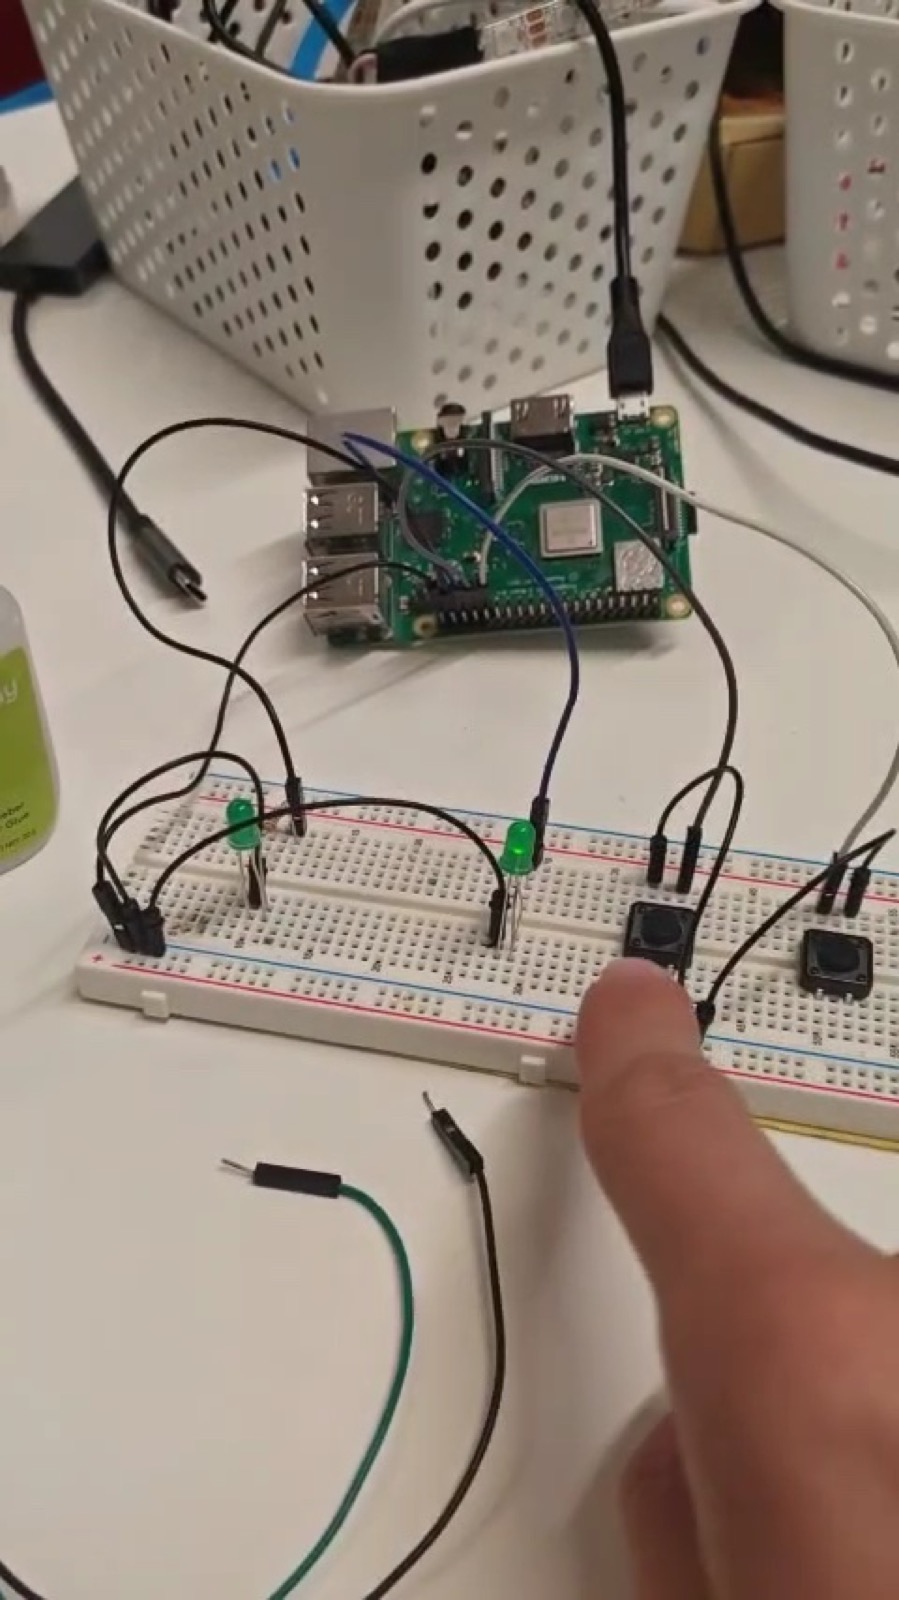
Before touching the wooden box, we built a minimal prototype to get familiar with the Raspberry Pi: a breadboard with a couple of buttons and LEDs, and a first bit of Python that switched an LED when a button was pressed. Alongside it we built the first on-screen visualisation of the game. This first working prototype was shared with the team in the TI group. (Figure 3)
The physical controller
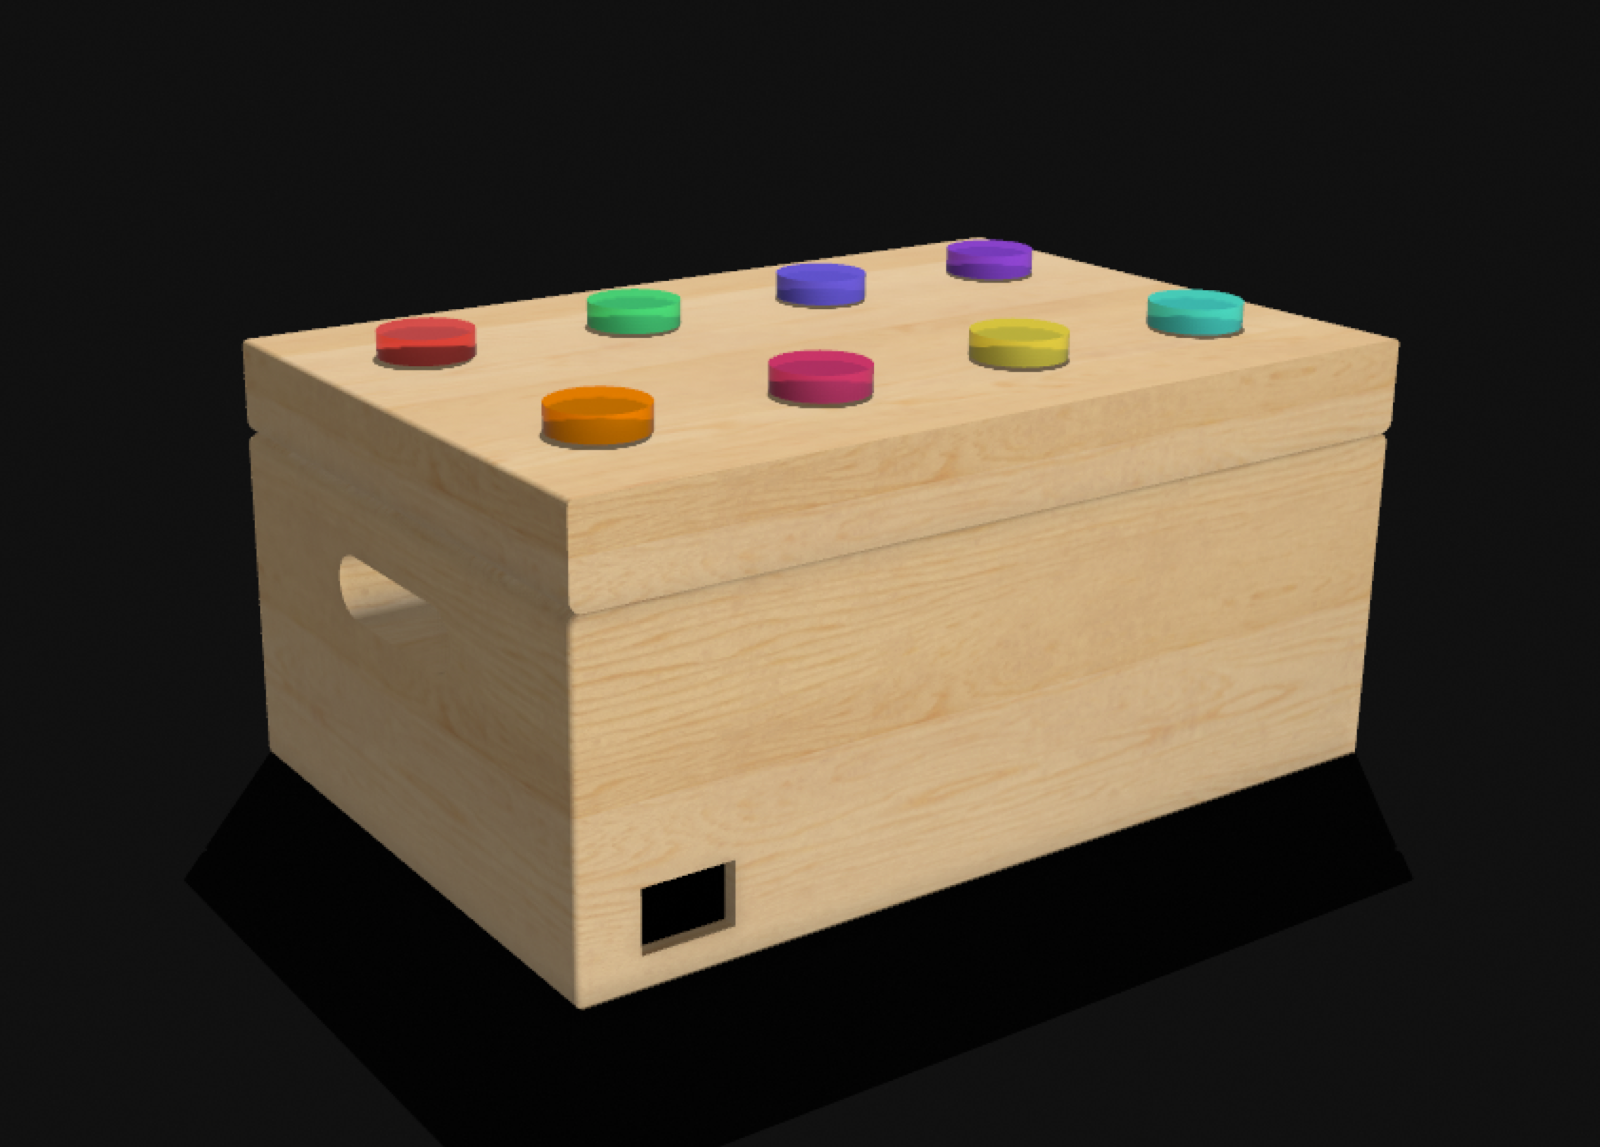
The wooden box is the heart of the project: every player action happens here. Together with the Model-Making group we chose a compact wooden case (14 × 20 × 30 cm) and worked out the exact layout - eight arcade buttons in a 3–2–3 arrangement, three level-selection buttons with indicator LEDs on the left, and a hole on the back for power and HDMI.
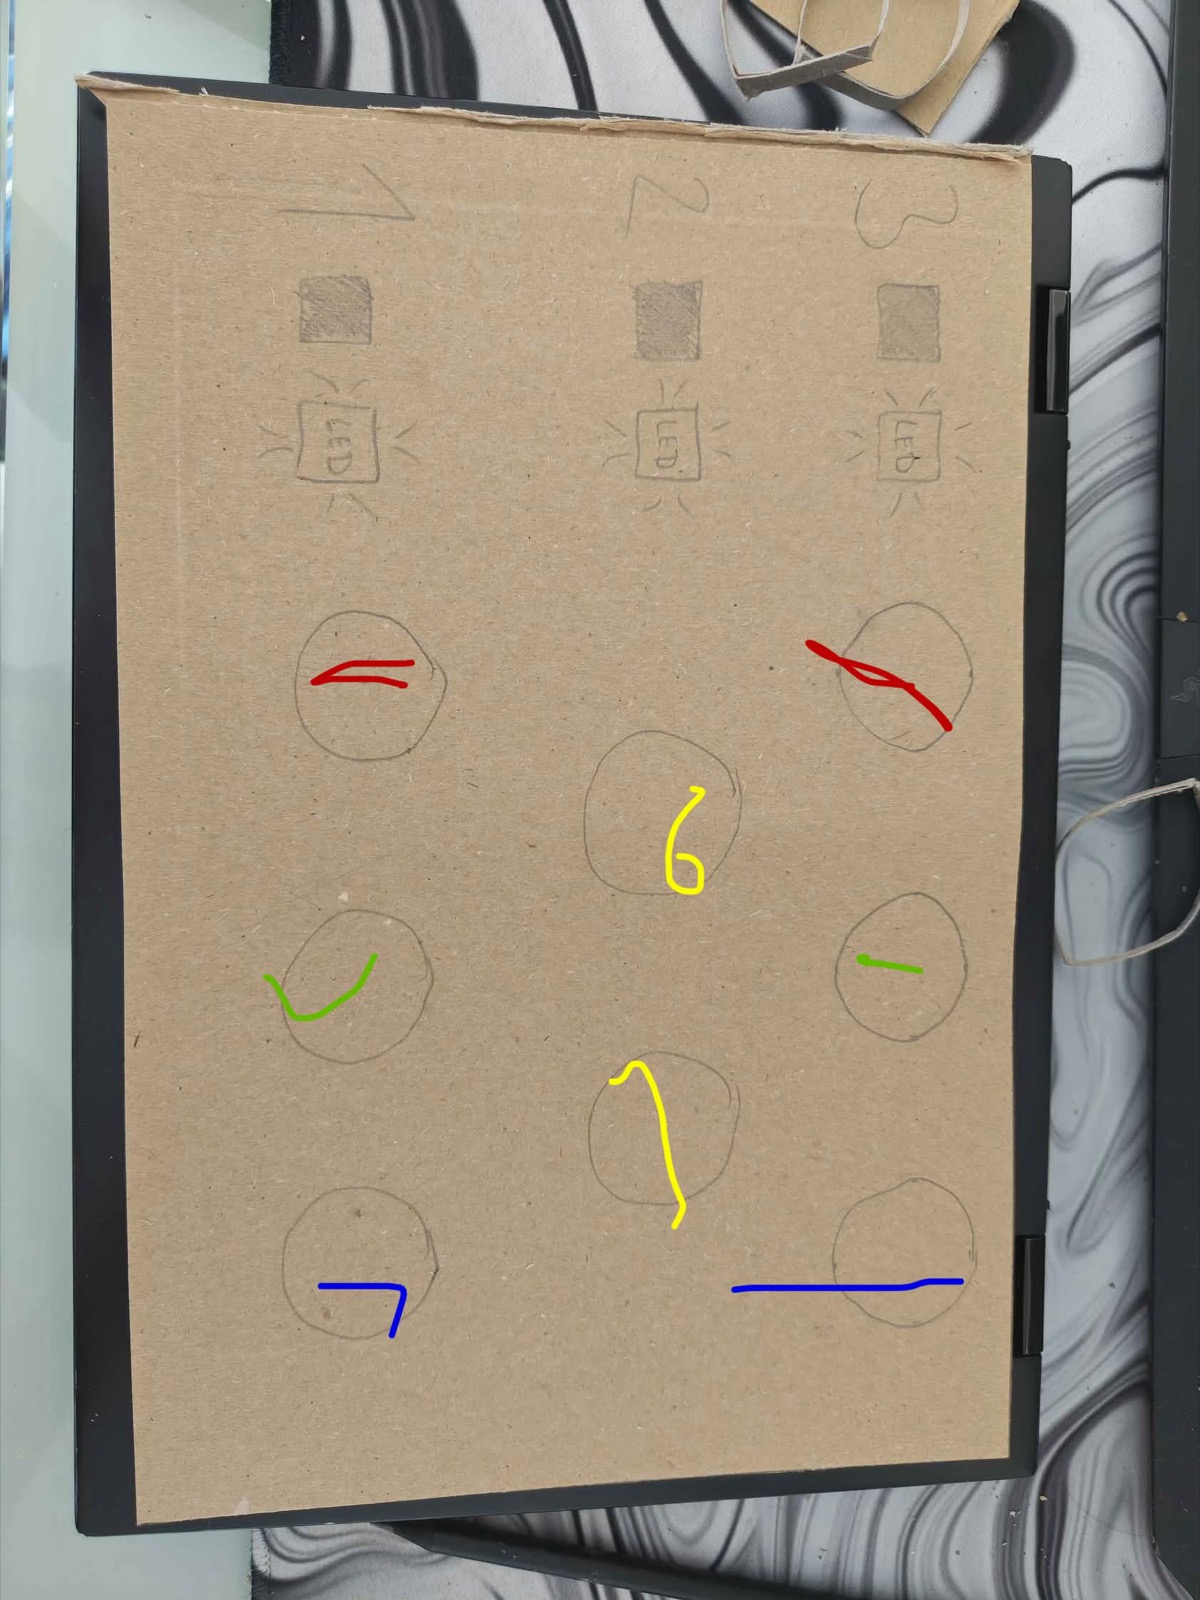
We first tested the button spacing on a simple cardboard mock-up. (Figure 4)
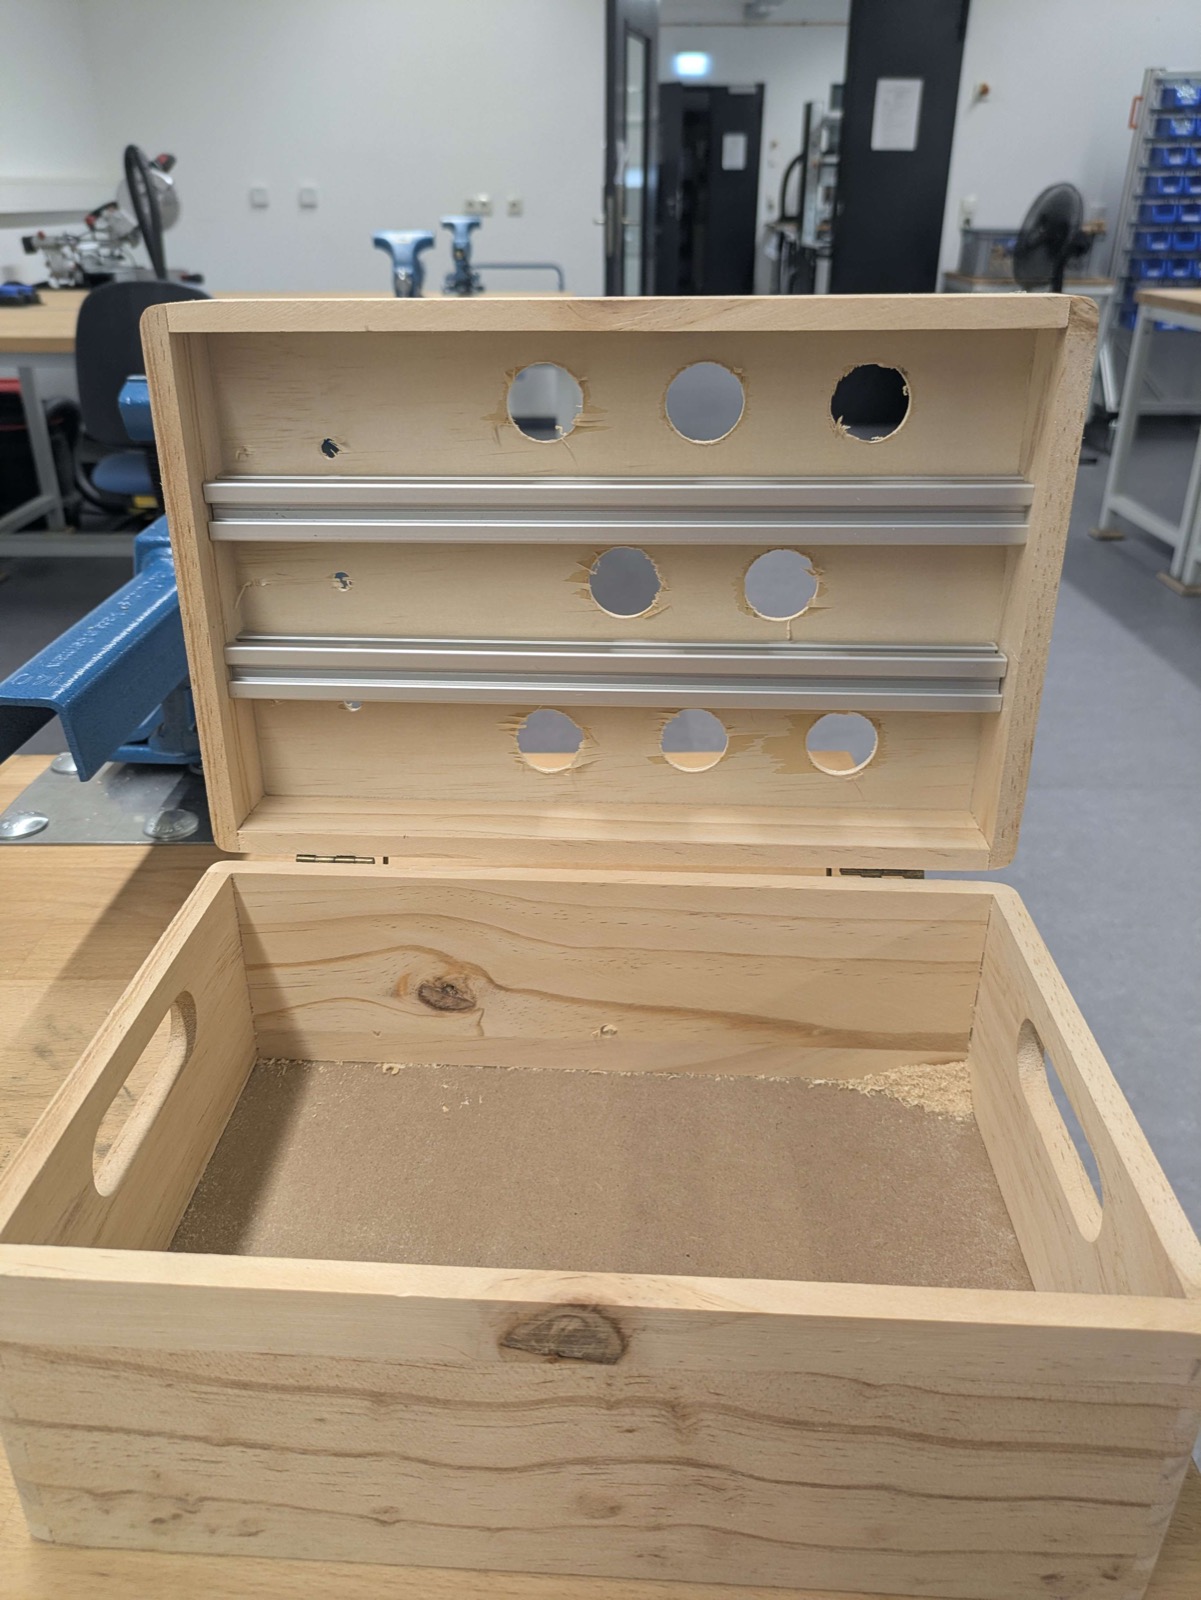
The Model-Making group then drilled the case and reinforced the relatively thin top plate with two aluminium profiles - important, because the box has to survive children energetically pressing the buttons. (Figure 5)
The final illuminated, translucent arcade buttons use a microswitch for the press and a built-in LED.
Electronics and wiring
Wiring was one of the biggest practical challenges. Each of the eight arcade buttons needs four connections (signal + GND for the switch, 5 V + GND for the built-in LED), plus the level buttons and level LEDs - on the order of ~40 wire ends inside a small box.
We drew a wiring plan by hand. (Figure 6)
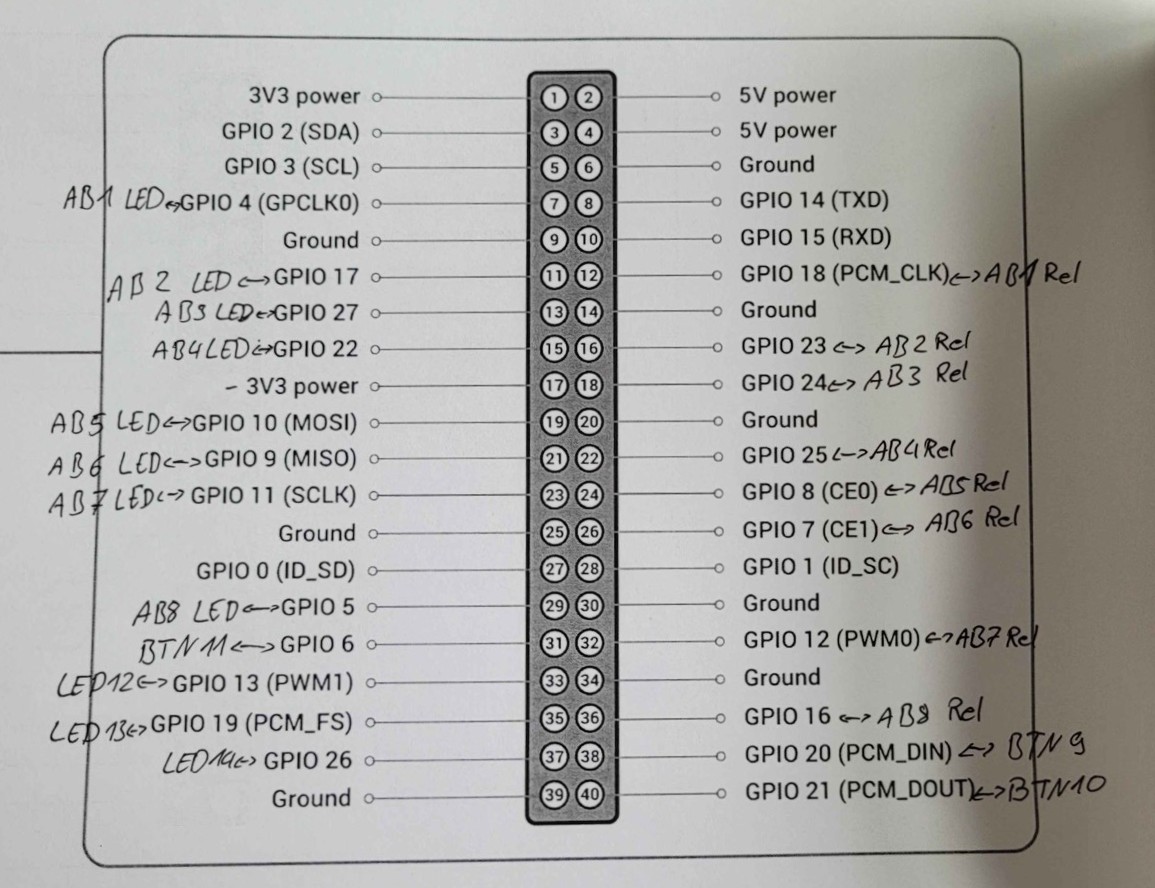
From that, we worked out the complete pin assignment - every button, LED and the level selection mapped onto the Raspberry Pi’s header - so the build and the code could follow one shared reference. (Figure 7)
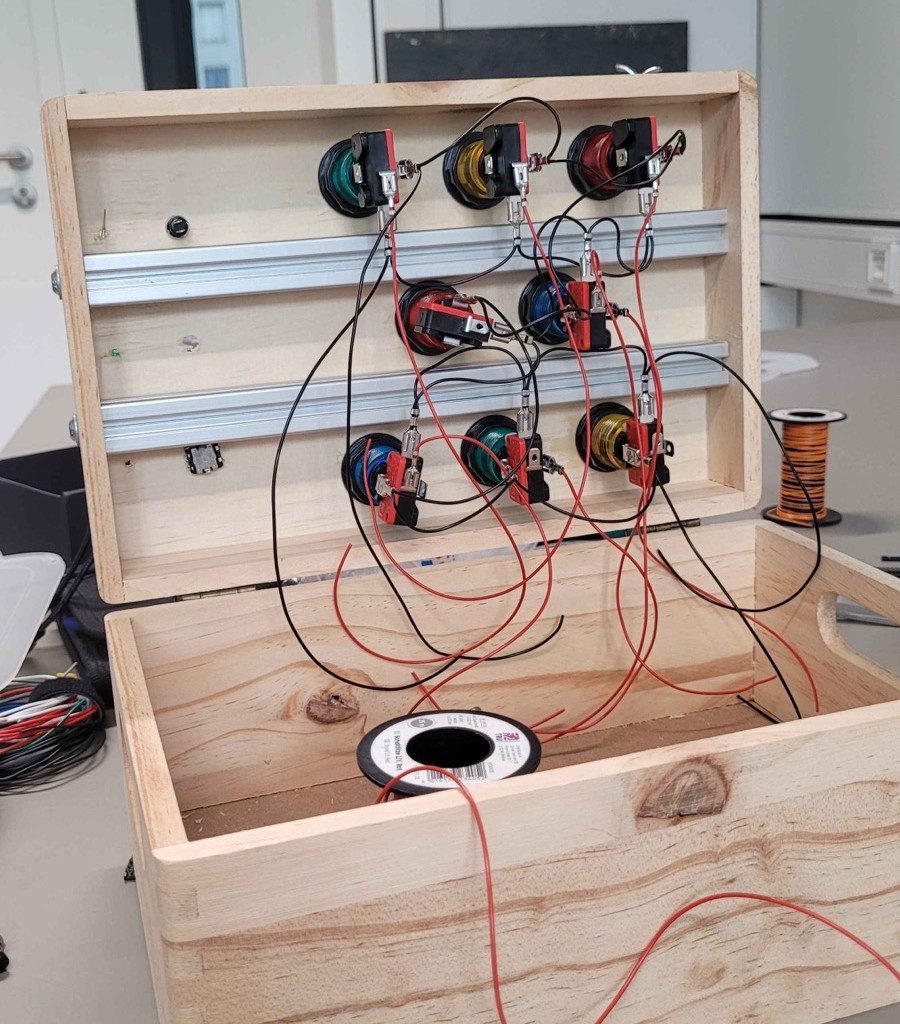
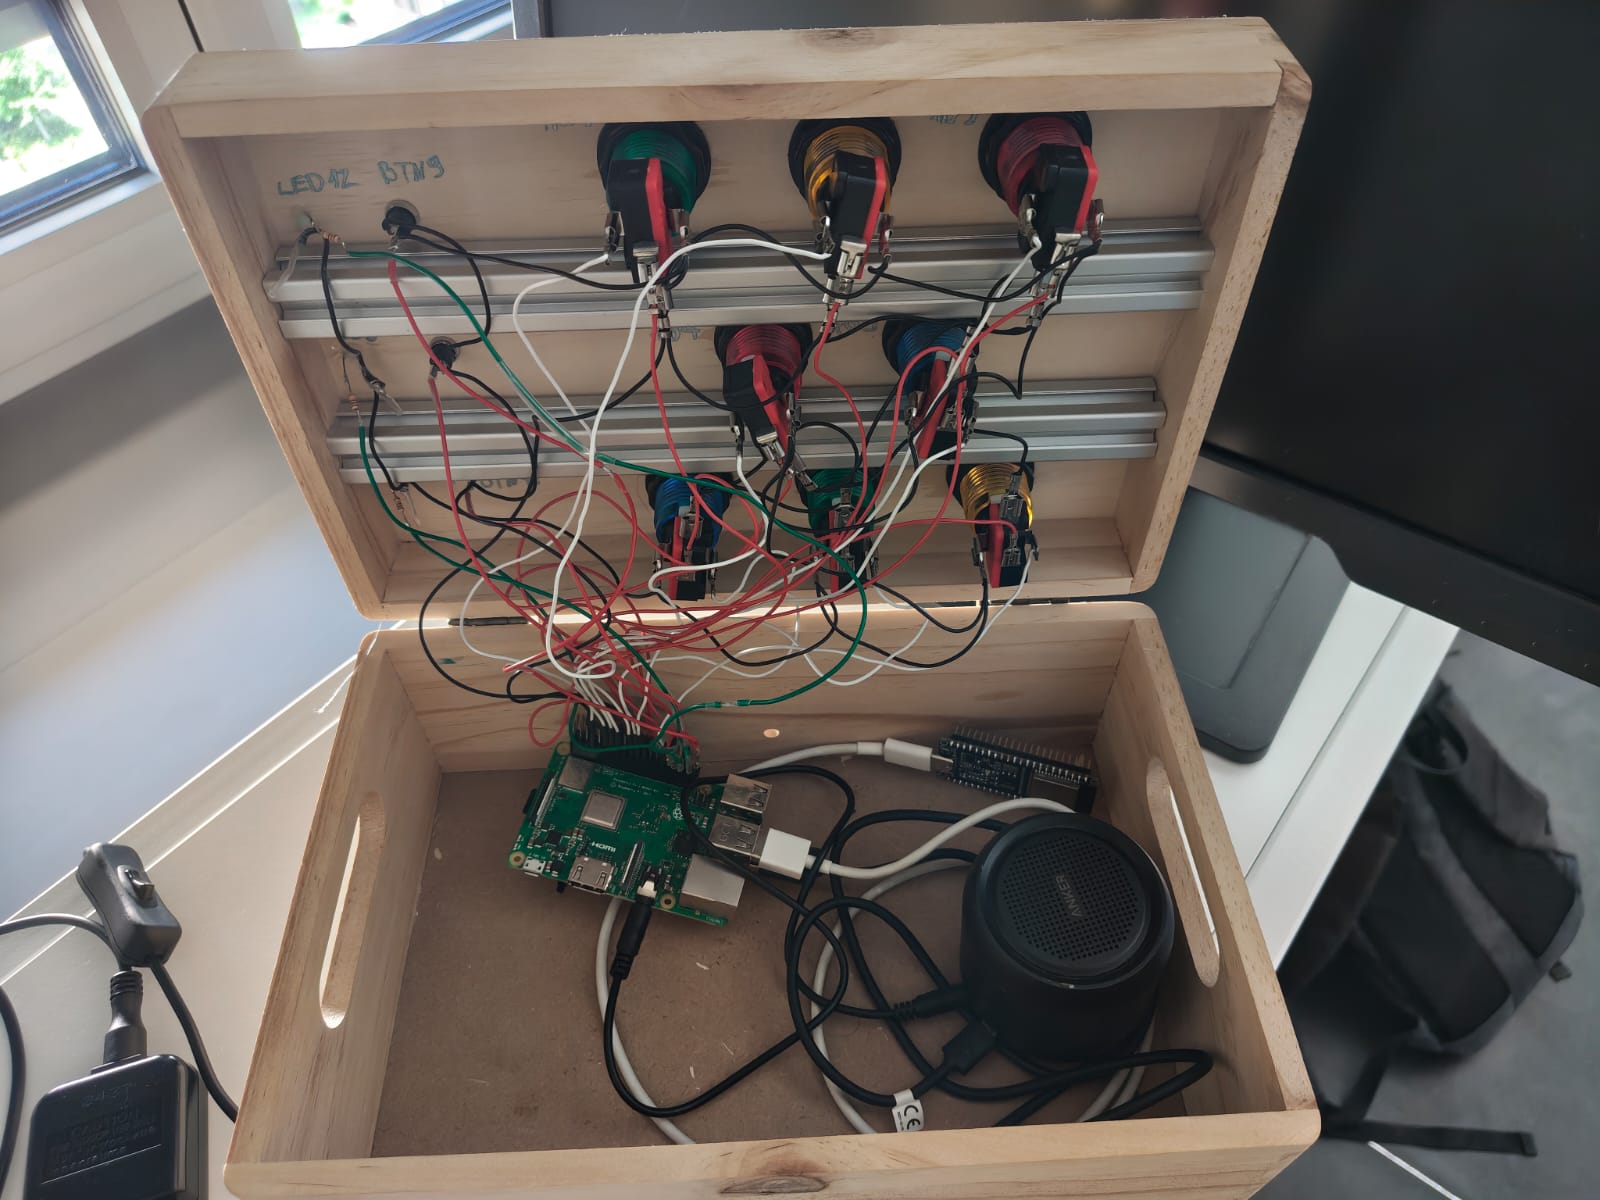
Then everything was mounted and wired inside the box. (Figure 8)
The brain of the controller is a Raspberry Pi 3B+, mounted in the lower half of the box together with the speaker; power and HDMI reach it through the side. (Figure 9)
The buttons are wired against GND and read via the Pi’s internal pull-up; the LEDs are driven directly from the GPIO pins.
Software, the game and the interface
The game is written in Python with pygame and runs full-screen on the Raspberry Pi. It starts automatically when the box is powered on, as a full-screen kiosk with no keyboard needed: any arcade button starts or restarts a game, and the level buttons select the level.
Game logic: A sequence is shown round by round; it grows each round and must be reproduced on the physical buttons.
- Three levels with increasing difficulty. Each round adds 1 / 2 / 3 buttons in level 1 / 2 / 3.
- A level is won after 4 / 3 / 3 rounds - a final sequence of 4 / 6 / 9 buttons.
- The player has three lives (hearts). A wrong press costs a life and repeats the sequence; losing all lives ends the game.
- A 3–2–1 countdown precedes each round.
Character animation: We created animated GIFs of the MAMAgotchi. The animation is progress-dependent - idle on the start screen and advancing with each round and on a win - so the character visibly builds up as you play.
Sound: All sounds are generated at runtime (sine / square tones) rather than loaded from files: a distinct tone per button, countdown ticks, positive / negative feedback, a Game Over motif and a cheerful win jingle.
The care mechanic and the interface
Because MAMAgotchi is a shared character, the playroom talks to a central unit over ESP-NOW (built on the Interface group’s TangibleAPI). An ESP32-S3 inside the box bridges this radio link to the Pi over USB serial:
- The central unit continuously broadcasts the pet’s state. If it is too hungry or too tired, the room is blocked: a banner (“MAMAgotchi braucht eine Pause”) appears and no new game can be started. A game already in progress may be finished - a deliberate choice to avoid frustration.
- When a level is won, the Pi sends one message back, and the ESP reports the success exactly once to the central unit, raising the pet’s play need.
This is also where our most instructive engineering detour happened. The first plan was to keep the ESP powered off and only switch it on to send on a win. During a live test with the Interface group we discovered that the Pi 3B+ only cuts the USB data lines in software, not the 5 V supply - so the ESP kept running and transmitting the whole time. We scrapped that approach and replaced it with a clean serial JSON protocol, which is reliable and needs no extra hardware.
Engineering challenges and how we solved them
The stretch between “a first prototype” and “a stable exhibition piece” was dominated by systems problems, not game code.
(Figure 10)
Power supply - the root of many failures. A weak power supply caused undervoltage on the Pi, leading to instability and crashes. In one case the undervoltage even corrupted the SD card’s MBR signature, so the kernel could no longer find the root partition and dropped into an emergency shell. We recovered the card by rewriting the signature, and from then on used a strong 5 V / 3 A supply and always shut down cleanly. Lesson: on a single-board computer, suspect the power supply first, not last.
Display - black screen. Rendering directly through SDL’s kmsdrm backend produced only a black screen on this Pi. We switched to a minimal X server with autologin and full-screen autostart, and forced the HDMI mode via a boot parameter so the monitor is always detected.
Audio - crackling. Two fixes stopped the constant crackle: pinning ALSA to the analog jack (it defaulted to HDMI), and setting a larger mixer buffer before pygame.init(), which otherwise starts it too small and causes underruns. The remaining dull tone is a hardware limit of the Pi’s PWM headphone jack.
Performance - a deliberate trade-off. The Pi 3B+ software-renders the full 1080p screen at about 5 fps. An optimisation pass doubled that, but we reverted it to keep the sharper visuals - since the game’s timing is time-based, the frame rate doesn’t affect play.
Memory - fitting the animations into 1 GB. The supplied animations were 15 GIFs of ~125 MB each - far too large for the Pi 3B+’s 1 GB of RAM. We built a pipeline that splits each GIF into small JPG frames and a loader that keeps only the active level’s frames (plus the idle clip) in memory, loading in a background thread.
The “everything broke” day. Shortly before the show, a session where “nothing worked anymore” turned out to be a combination of the power issue above and loose cables - once re-seated (and with the strong supply), all eight arcade buttons, the three level buttons and all the LEDs worked again.
Limitations and future work
Several parts of the current build are deliberately “good enough for the exhibition” rather than final:
- Deployment. The kiosk autostart (X server, full-screen launch, audio routing) still has to be set up by hand on each Raspberry Pi. If the Pi ever needs to be replaced - e.g. after a defect - this setup has to be repeated; a prepared SD-card image or a small provisioning script would make that painless.
- Audio quality. The analog PWM headphone jack sounds dull. USB or Bluetooth audio would clearly improve it, at the cost of extra latency (bad for a reaction game) and 2.4 GHz contention with the ESP-NOW link.
- Frame rate. Software-rendering 1080p on the Pi 3B+ caps the game at about 5 fps. A more capable board would allow smoother animation.
- Durability. One arcade LED is currently dead, and the dense hand-wiring inside the box would benefit from more robust, soldered connections for repeated exhibition use. We tried our best to make it as robust as possible.
Natural next steps are additional game modes, finer difficulty tuning, and richer audiovisual feedback that ties the play even more tightly to the shared character’s mood.
Conclusion
The playrooms’s contribution to MAMAgotchi is a tangible, child-friendly game that turns play into care: a robust wooden controller with eight illuminated arcade buttons, a Simon-style memory game on screen, and a live link that feeds the shared pet’s play need. In practice, most of the effort went not into the game logic but into the systems integration around it - power stability, getting a picture on the screen, clean audio, and a reliable channel to the interface system. A recurring lesson runs through those decisions: the simpler, more robust option usually won - a serial protocol instead of USB power-gating, three physical buttons instead of a magnetic level pin, LEDs driven straight from the GPIO instead of an extra driver chip. The result is a self-contained box that boots straight into the game and runs unattended at the Werkschau, keeping the metaphor of ongoing care legible and playful for its visitors.
References
Interface group. (2026). MAMAgotchi - central infrastructure (source code). HTW Dresden GitLab: tangible-schnittstelle, tangible-zentrale-visualisierung.
pygame. (2026). pygame documentation. https://www.pygame.org/docs/
gpiozero. (2026). Python GPIO library documentation. https://gpiozero.readthedocs.io/
pinout. (2026). Raspberry Pi GPIO / 40-pin header reference. https://pinout.xyz/
Espressif. (2026). ESP-NOW protocol overview. https://www.espressif.com/en/products/software/esp-now/overview
Repository The full source code for the playroom game: PhilipPoplutz/MAMgotchi-Spielzimmer.
Disclosure statement. This text was prepared with the assistance of the AI language model Claude (Anthropic), which was used for drafting and linguistic revision. The authors defined the content and remain responsible for the final version.